Diving the SAS ''Pietermaritzburg''

The SAS Pietermaritzburg dive site is a recent wreck in the Miller's Point area on the False Bay coast of the Cape Peninsula, near Cape Town in the Western Cape province of South Africa.
Understand[edit]


This is an easily accessible wreck in fair condition, but deteriorating rapidly, at a moderate depth. It is a popular site for introductory wreck dives and night dives, mainly due to the moderate depth and short distance from the launch site.
The wreck is of some historical interest, but is not protected by legislstion as it is not of archeological importance, and it is less than 60 years since it was scuttled (in 1994).
There is a movement to have the wreck protected due to its historical interest and popularity as a dive site, as commercial salvors have been removing parts of the wreck (July 2012).
Position[edit]
- 1 SAS Pietermaritzburg wreck: S34°13.303’ E018° 28.465’ (PS)
- S34°13.300’ E018° 28.452’ (Alternative mark - GW)
This site is in a Marine Protected Area (2004). A permit is required.
Name[edit]
The keel of this Algerine class ocean minesweeper was laid down on 8th October 1942 at Lobnitz and Co. Renfrewshire, the ship was launched on 18th June 1943 and completed on 7th October 1943. The ship was first commissioned in the Royal Navy as HMS Pelorus and took part in the D-day invasion of Normandy in the Second World War as the lead ship sweeping mines to make way for the invasion fleet.
Sold in 1947 to the South African Navy the renamed "HMSAS Pietermaritzburg" was used as a training vessel and minesweeper. It was last decommissioned in July 1964, served as accommodations for the Mine Countermeasures squadron from 1968 to 1991 and was scuttled by explosive charges on 12 November 1994 to form an artificial reef.
| Displacement loaded | 1330 | tonnes | |
| Length over all | 68 | .6 | m |
| Beam | 10 | .8 | m |
| Draft | 3 | .5 | m |
| Indicated power | 2400 | Hp | |
| Boilers | 2 | 3-drum | |
| Engines | 2 | Vertical 4-cylinder triple expansion | |
| Screws | 2 | ||
| Speed | 16 | knots | |
| Endurance | 5500 | n. miles at 10 knots | |
| Complement | 115 | ||
| Armament | 2 | 4" guns | |
| 2 | 40mm Bofors Anti-aircraft | ||
| 4 | Depth charge launchers |
Depth[edit]
Maximum depth is 22 m on the sand to the stern. The sand at the bow is about a metre shallower, except in the scour pit, which is about 2 m deep at the forefoot. The deck at the bow is at about 17 m, and it slopes down gradually to the region of the wheelhouse, where the hull has fractured across the width of the vessel. The forward section is canted to port, and the midship section remains fairly level. The hull is also fractured at the break of the quarterdeck which is now almost as high as the midship section. The quarterdeck slopes down from 17 m at the high point to starboard at the break, down to about 19 m on the port side of the transom. The high point is at 16.5 m depth at the aft end of the superstructure.
Visibility[edit]
Visibility is not often as much as 10 m, and frequently less than 8 m, but occasionally it can exceed 15 m, and there have been reports of divers spotting the wreck from the boat, which implies flat water and visibility of at least 18 m. Visibility at the surface is not always the same as at the bottom, and it is quite common to have a murky surface layer several metres deep, with better visibility below. This may result in good visibility but poor lighting on the wreck.
Topography[edit]
The wreck used to be upright on the flat shell-sand bottom. The ship lay almost level, imbedded in the bottom as if floating in sand. Bow is to the south, Longitudinal axis close to north/south True. The deep scouring at sides where holes let water surge through has largely filled in since the structural collapse of the hull, and is now mostly around the bow. Water movement still prevents heavy silting and washes disturbed sediment clear fairly quickly.
The hull structure has weakened and collapsed along the lower sides, and the whole wreck forward of the quarterdeck has slumped by a couple of metres, and on the port side even more, and the gunwales which were originally several metres above the sand are now only about 3 m from the sand to starboard and a bit over a metre for much of the port side of the foredeck. This has done a lot of interior damage. and previously open access is now compromised. The forward part of the superstructure has completely collapsed, and is now a low profile heap of rusted plate fragments lying just above the level of the sand. The after part of the superstructure just forward of the break of the quarterdeck still stands, but most of the side plating has gone and you can swim straight through under the deck in most places. The quarterdeck has been least affected by these collapses, but the plating has corroded to the extent that a shot weight can fall through the deck plating.
The forward part of the hull has consequently tilted to port with the remains of the foredeck at a fairly steep angle, and parts of the deck have fallen away altogether, particularly in the area of the bridge deck. A strong storm could easily cause further collapse, and penetration of the hull should be considered fairly high risk, even in mild surge, and dangerous in a strong surge.
Penetrations of the quarterdeck section are relatively straightforward. there is good access from the fracture on both sides of the hull and from the opening in the deck plating in the aftermost compartment. The interleading doors are fairly large and clear, but there is a certain amount of snaggy stuff in the form of racks and wiring hanging around. The hatchway from the middle compartment is not very big, but should be big enough for most divers if you don't mind getting reef organisms all over your suit, so best not used unless really necessary.
The main part of the hull is partly accessible. There is an entrance aft from the fracture area on the starboard side of the transverse bulkhead which is quite low due to the subsidence, and partly obstructed by the quarterdeck structure. This opens into an alleyway leading forward with small compartments on both sides. The forward end of the alleyway opens into a machinery space and you have to go to starboard to get around the central mass of equipment (there are lots of loose and dangling bits of debris in this area), and can then exit at the midships fracture area to starboard of the machinery. The small compartments are on the whole very dark, fairly silty, and don't have much of interest in them, and their doors are quite narrow.
The aft superstructure is easily accessible, as most of the side plating has rusted away, leaving a mainly open sided structure with a deck above and below. This has a few snags, but is relatively clear, and would not normally be considered a penetration, as you can swim straight through most places without touching sides or changing direction.
The wheelhouse and bridge deck have completely collapsed. All that remains of the forward superstructure is a lot of thin rusty plate in a low heap in the collapsed area of the hull.
The forecastle section, from the forward gun position to the bow, is canted to port by about 30°, and access may be possible from the fracture area, but does not look safe, with loose plates and lots of dangling cable and other snags obscuring narrow tilted doorways and sharp changes of direction. The stability of the structure is doubtful, and there are no alternative exits.
Geology: Flat sand bottom surrounds the wreck. The nearest known reef is about 100 m to the east, and is granite.
Conditions[edit]
The site is exposed to wind from all directions and waves from the south east and southwest. The site will usually be at it's best in conditions of limited surge, particularly if penetration is intended, as the wreck is fairly shallow. Generally this means a low south-westerly component. If the south-easter is blowing there may be a slight current setting northwards, and the chop may make it difficult to see a diver on the surface.
Wind chop from the north does not usually reach to the depth of the wreck. The site is usually dived in the winter, as a south-easterly swell will often reduce visibility and make the surge unpleasant.
Get in[edit]
The site can only safely be accessed by boat, usually from Miller's Point slipway, which is about 1 km away or Simon's Town jetty. It would be possible to swim out from the shore, but this is an area of heavy boat traffic at times, and the risk is a bit high, as many of the skippers are not as diligent as they should be.
See[edit]
Marine life[edit]
The wreckage is heavily encrusted with invertebrates, and home to several species of fish. In September 2010 the dominant invertebrate species was clearly the Mauve sea cucumber, which is actually more a light grey in colour. The external surface of the wreck was covered almost everywhere with a carpet of these echinoderms. As of July 2011, there are far fewer cucumbers present, and many areas of the wreck are nearly bare. This may be a consequence of bad weather and structural collapse.
-
 Invertebrates have colonised the wreck
 -
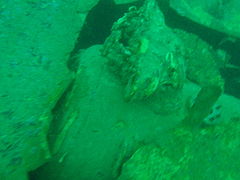
 Octopus
 -
 Sea squirts


Features[edit]
Steel wreck of some historical interest, in rapidly deteriorating condition.
-
 The anchor winch on the foredeck
 -
 Looking out to starboard from under the quarterdeck
 -
 Heavy machinery punched a hole in the deck when the hull subsided


Photography[edit]
This can be a good site for photography if the surge is moderate. Wide angle and fisheye lenses will capture more of the mood of the wreck if the visibility is poor, which is often the case. There will also always be subjects for macro photography, but then you might as well dive on a reef.
Routes[edit]
No particular routes recommended. Start at wherever the shotline falls, and swim round the hull, then work your way up to the superstructure. Those who are more interested in the marine life will find the heaviest encrustations along the gunwales and on projections above the deck. There are still a few non-trivial penetrations possible, but they are getting more risky as the structure deteriorates, and should probably not be attempted in a surge, as this may precipitate further collapse, and you would really not want to be inside if that happens. Noise of structural movement should be a strong indicator to stay out. The visibility inside is also likely to be poor if there is much water movement.
Stay safe[edit]
Hazards[edit]
The wreck is breaking up and is structurally unstable. There are the usual wreck diving hazards of entanglement and fouling on structure, and if the surge is strong also a risk of injury on sharp edges of plates and other parts. It is possible that the wreckage may collapse further without notice, particularly in a heavy surge, and there may be surge induced flow into openings in the structure which could drag a diver into the wreckage, causing injury on sharp edged plating and frames, or entrapment in debris.
The visibility inside the wreckage may be poor due to disturbed silting, particularly during surgey conditions or after unskilled penetrations, and the interior is full of major snags and several rather narrow access points.
Skills[edit]
No special skills required for non-penetration dives. Certification for the depth range is expected.
This wreck was suitable for penetration dives by suitably competent and equipped divers, however this now less so. Careful planning and reconnaissance is recommended before attempting penetrations, and there is not much inside worth looking at. The site is also suitable for night dives.
Equipment[edit]
A light is highly recommended as it is often fairly dark and there are many openings to look into. Nitrox can significantly extend your no-stop time at this site.
Nearby[edit]

- 1 Omega Reef
- 2 Rocklands Blinder
- 3 Alpha Reef
- 4 Spaniard Rock
- 5 Stern Reef
- 6 Caravan Reef - PMB Pinnacles
- 7 Caravan Reef - North Caravan
- 8 Caravan Reef - Caravan Central, east pinnacle
- 9 Caravan Reef - Inner Caravan
- 10 Caravan Reef - South Caravan
Back to the Alphabetical list of sites, or list of dive sites in the Miller's Point area
Other regional dive sites: